If you want to handle video editing like a pro, it’s crucial to have a blazing-fast editing performance. And one of the most effective ways to boost up the video editing performance in Adobe Premiere Pro CC is by using GPU acceleration.
But, how to enable GPU acceleration in Adobe Premiere Pro CC? That’s exactly what you’re going to find out. In fact, this guide will teach you everything regarding GPU acceleration.
That said, let’s get started.
What is GPU Acceleration in Adobe Premiere Pro?
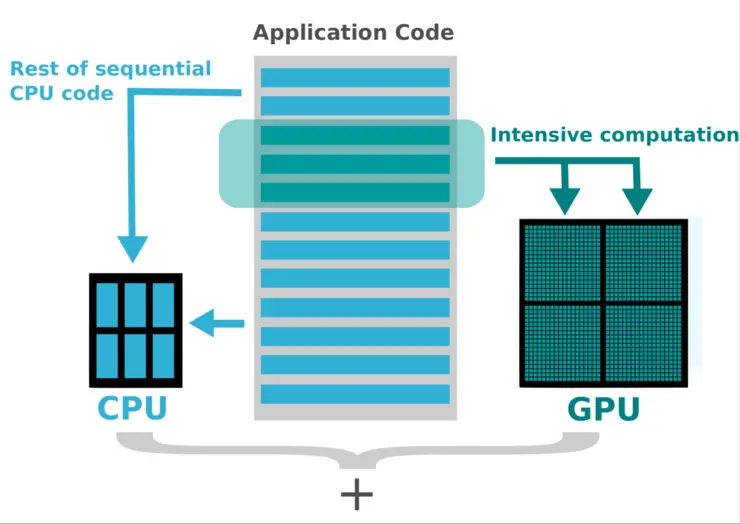
Image by: scientific volume imaging
At normal conditions, Adobe Premiere Pro mainly uses CPU only. The video editing, rendering, and much other processing are being handled by the CPU mainly, while the GPU only assists in processing.
But as soon as you enable GPU acceleration, the hardcore processes are divided among both CPU and GPU. And what happens what you combine two beasts?
Well, in this case, the performance significantly boosts up, saving you a lot of precious time and working at the speed of your brain, making processes complete before you lose a creative idea.
So, if you do have a GPU in your PC, make sure to enable GPU acceleration to make the most out of your time.
With that said, here are the GPU requirements for Adobe Premiere Pro CC.
Graphics Card Requirements for Adobe Premiere Pro
If you haven’t purchased a GPU yet, consider these graphics card requirements when purchasing one:
- 1080p – 4GB VRAM
- 4K – 6GB VRAM
- 6K or higher – 8GB or higher VRAM
As you see, 4GB is the lowest VRAM to aim for. Even if you’re willing to edit projects that are below 1080p resolution (720p), you might still want to go for 4GB VRAM for a smooth workflow.
Learn How to Build a GPU Externally with our thorough guide.
That said, another important point to note is that Nvidia’s graphics cards offer significantly higher performance in video editing and similar tasks (content creation) compared to AMD GPUs.
Therefore, it is recommended to go for an Nvidia GPU (as long as your budget allows you to).
Another important thing to consider when purchasing a GPU is that the driver support for old GPUs will soon end and the user experience will get worse by passing time. So, going for an old graphics card is not an ideal option.
Rather, go for the latest GPU on the market, if your budget allows you to. It will not get outdated in years, at least.
Are you new to terms like GPU? Don’t know how to set up a GPU? Learn how to install a new GPU with our definitive guide.
That said, let’s put the benefits of GPU acceleration and the GPU requirements for it aside, and see how to enable GPU acceleration in Adobe Premiere Pro CC.
How To Enable GPU Acceleration In Adobe Premiere Pro CC
Follow these simple steps to enable GPU acceleration in Adobe Premiere Pro CC:
- Run Adobe Premiere Pro CC
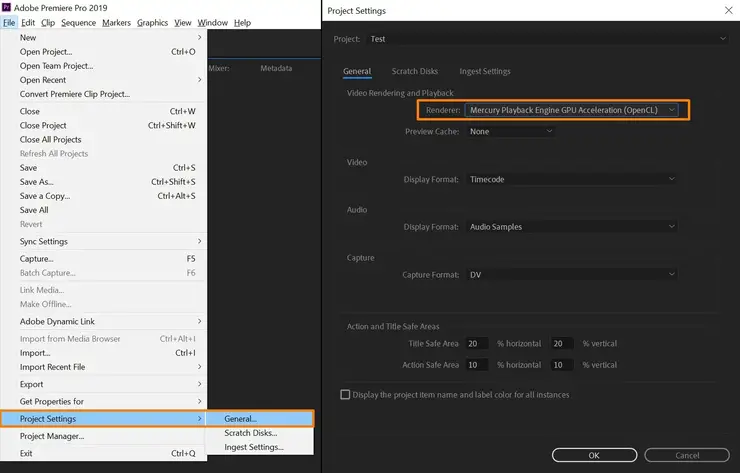
- Go to file > Project settings > General settings > Video rendering and playback
- Now, set the option of Renderer to Mercury Playback Engine GPU optimization
That’s it. The GPU acceleration is enabled.
To check out the performance boost, try exporting a video editing project.
However, if you don’t see the option for Mercury Playback Engine GPU Optimization in the settings, you need to fix the GPU drivers as they may be corrupted or outdated.
How to Fix GPU Drivers
Follow these methods to make sure GPU drivers work perfectly:
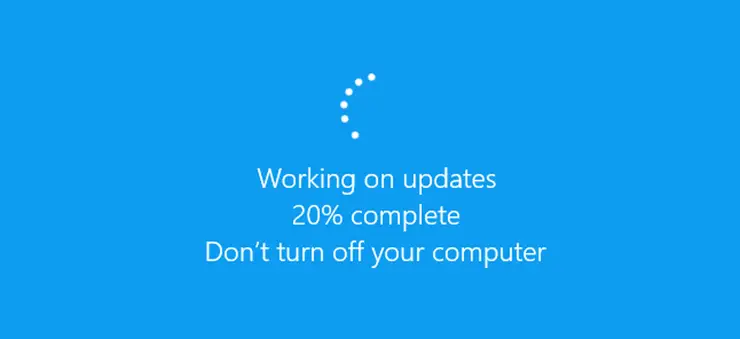
- Do a Windows update, it will automatically update your GPU drivers
- Go to device manager and open your GPU properties under the display adapters settings. Now head over to the Driver tab and update the drivers from here
- If it still doesn’t work, consider downloading the compatible GPU drivers manually on the internet
Want more information regarding how to fix GPU drivers? Read our guide on how to roll back GPU drivers.
Now, one of the major questions people have is whether having dual GPUs installed on the computer helps in Premiere Pro GPU acceleration or not. Here I answer that:
Do GPU Acceleration Work With Dual GPUs (SLI or Crossfire)?
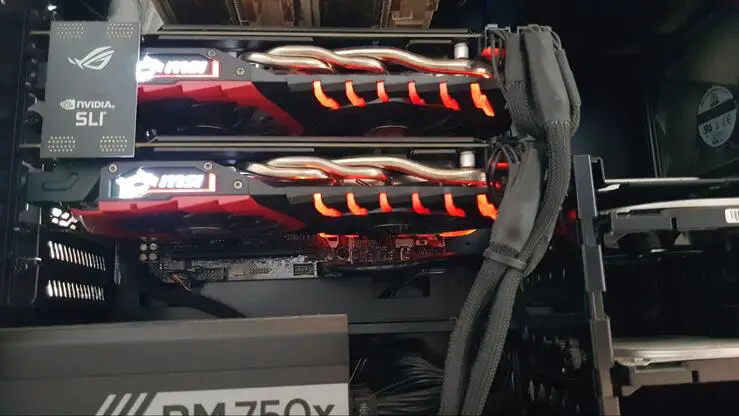
Image by: Tom’s hardware forum
If the performance from one CPU and one GPU doesn’t suit you, you can pair up another GPU with either Nvidia SLI or AMD Crossfire technology.
Thankfully, the Adobe Premiere Pro CC does support these technologies, and having dual GPUs installed actually helps in boosting the performance.
The GPU acceleration technology takes both the GPUs as a single GPU and since two graphics cards are paired up, the performance levels up.
That said, if you’re experienced with Adobe Premiere Pro, here’s another query you can have:
Why is The Integrated GPU in Use?
Despite having a dedicated GPU installed and running, you can still experience the integrated GPU being used when performing operations on Adobe Premiere Pro CC. Here’s why it happens:
The Mercury Playback GPU acceleration function doesn’t only use the dedicated GPU for video rendering and graphics-intensive tasks.
Since there are a lot of processes to be done, this engine also distributes some specific tasks like UI to the integrated GPU for maximum performance.
Therefore, you can experience the integrated GPU to be used when using Adobe Premiere Pro CC.
Actionable Tips to Make Premiere Pro Run Faster
As a rule of thumb, having powerful hardware installed is essential for smooth performance. However, there also are some other things you can do to boost up the overall performance during video editing.
Memory Allocation
When using Adobe Premiere Pro, the RAM of your computer is consistently switching from performing other Windows tasks to Adobe Premiere Pro and may result in a laggy video editing experience. It could even result in a memory crash.
However, a way around is by limiting the RAM for Adobe Premiere Pro. Here’s how to do that:
- Go to preferences and head over to memory settings
- From here, you can dedicate the RAM for different Adobe products you have installed
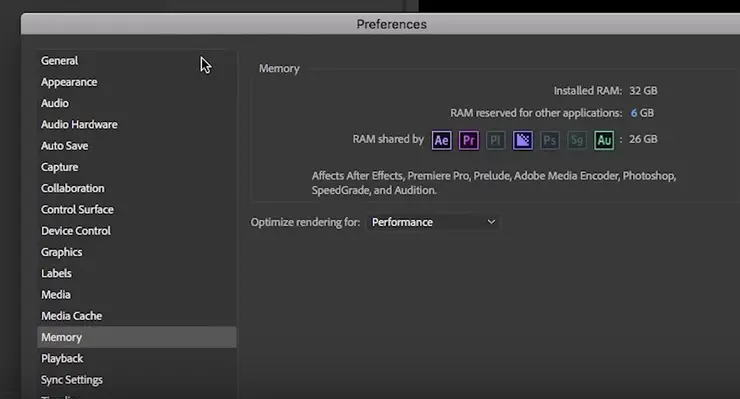
If you have 16GB Ram on your PC, dedicating 12GB for Adobe is a great option. Apply the same rule for whatever amount of RAM you have.
Decrease the Playback Resolution
If you’re experiencing lags when previewing your video editing project, it means that more RAM and hardware resources are being used to preview it.
In order to reduce the hardware usage, it’s good to decrease the playback resolution from Full to ½ or ¼. Now, the point to note is, it will only reduce the playback or previewing resolution, the resolution of the final project will remain the same.
Clean Up the Media Cache
One of the most effective ways to make Adobe Premiere Pro run faster is by clearing up your media cache. Here’s the most convenient way to do that:
- Open Adobe Premiere Pro
- After the application is started, hold Alt + Shift. It will clear the media cache and preferences cache on the app. For Mac, use the shortcut Option + Shift.
Disable Clips When Not in Use
When starting to edit a project, you might have gathered a lot of raw material (clips) to prepare that. All of which may be high-resolution and consistently consume your hardware resources.
In that case, it’s great to disable the clips when not in use. It will significantly improve the editing performance.
Use Proxies
Proxies are basically the duplicated versions of your original project files. The special part of these duplicated versions is they are low-resolution and consume much lesser hardware resources, yet allow you to conveniently edit your video project.
Key Takeaways
To sum everything up, here are the action steps you can take to enable GPU acceleration in Adobe Premiere Pro CC:
- Open the application Adobe Premiere Pro CC and go to file
- Now head to Project settings > General settings > Video rendering and playback
- Set the option of Renderer to Mercury Playback Engine GPU optimization
But if the option isn’t available, likely your GPU drivers are faulty. Consider fixing them up.
That said, I hope this article proved to be helpful for you and answered the question “how to enable GPU acceleration in Adobe Premiere Pro”.
Until next time, cheers!
Frequently Asked Questions on How to Enable GPU Acceleration in Adobe Premiere Pro CC
Got questions regarding Premiere Pro GPU Acceleration? Here I answer some frequent ones.
GPU Not Being Used In Adobe Premiere CC?
If you’ve felt that Adobe Premiere Pro CC is still not using the dedicated GPU even after enabling the GPU acceleration, don’t worry. The program doesn’t use the dedicated GPU for some tasks like H. 264 decoding/encoding. Instead, it uses the Intel Quicksync for that.
Premiere Pro Keeps Crashing on Windows?
The major reason behind the crashing and screen flickering issues is corrupted or outdated graphics drivers. In that case, you might want your GPU drivers to be working properly. For that, you can update the Windows or update the drivers from the device manager.
How to make Adobe Premiere Pro CC run faster?
Below are some effective ways to make Premiere Pro CC run faster on your computer:
- Enable GPU acceleration from the settings
- Decrease the preview resolution if it doesn’t irritate you
- Turn on GPU previewing feature
- Disable video clips when not being used
- Disable high-quality playback
Another good way to run Premiere Pro smoother is by choosing a card with good clock speed. Learn how to check GPU clock with this guide.
What is the best video card (GPU) for Adobe Premiere Pro CC?
Below are the most recommended graphics cards to run Adobe Premiere Pro CC smoothly:
- Nvidia Quadro series (RTX 3000 – RTX 8000)
- NVIDIA TITAN series (RTX, V, Z, etc)
- Nvidia RTX 30 series (RTX 3080ti, etc)
- Nvidia RTX 20 series (RTX 2080, etc)
- Nvidia GTX 10 series (GTX 1070ti – GTX 1660ti)
Whatever graphics card you choose, make sure never to go for below 4GB VRAM. It will ruin your video editing experience. If you handle videos that are 4k or even higher resolution, 6-8GB VRAM is a good way to go.
For further information, read our guide on what is the best video card for Adobe Premiere Pro.
How to get rid of this effect requires GPU acceleration Premiere Pro?
The only actionable way to get rid of “this effect requires GPU acceleration” in Adobe Premiere Pro is to have a powerful GPU and to enable GPU acceleration in the program.
Furthermore, if you already have a GPU and GPU acceleration is enabled, but still, get this error, it means that the GPU is not powerful enough and you need to upgrade.