
Definitive Guide
Playing with computer hardware can sometimes get exhausting, especially if you’re a beginner, and so can installing a new GPU. So, how to install a new graphics card without having to deal with annoying issues? That’s exactly what I will guide you on.
From preparing your computer for the new GPU to installing and gaming on it, this guide covers everything. After spending ten minutes of your precious time on this guide, I can assure you that you’ll be able to install a new GPU on your computer like a pro!
With that said, let’s roll in.
How to Prepare Your PC for the New Graphics Card
Installing a new GPU is like changing a mobile phone: a lot of preparations to make, data to copy, and so on.
Here’s how to prepare your PC for the new GPU in easy steps:
Remove the Current GPU Drivers
If you already have a GPU installed, remove the current graphics drivers. Here’s how to remove graphics drivers in Windows:
Press the Windows key and R on your keyboard at once.
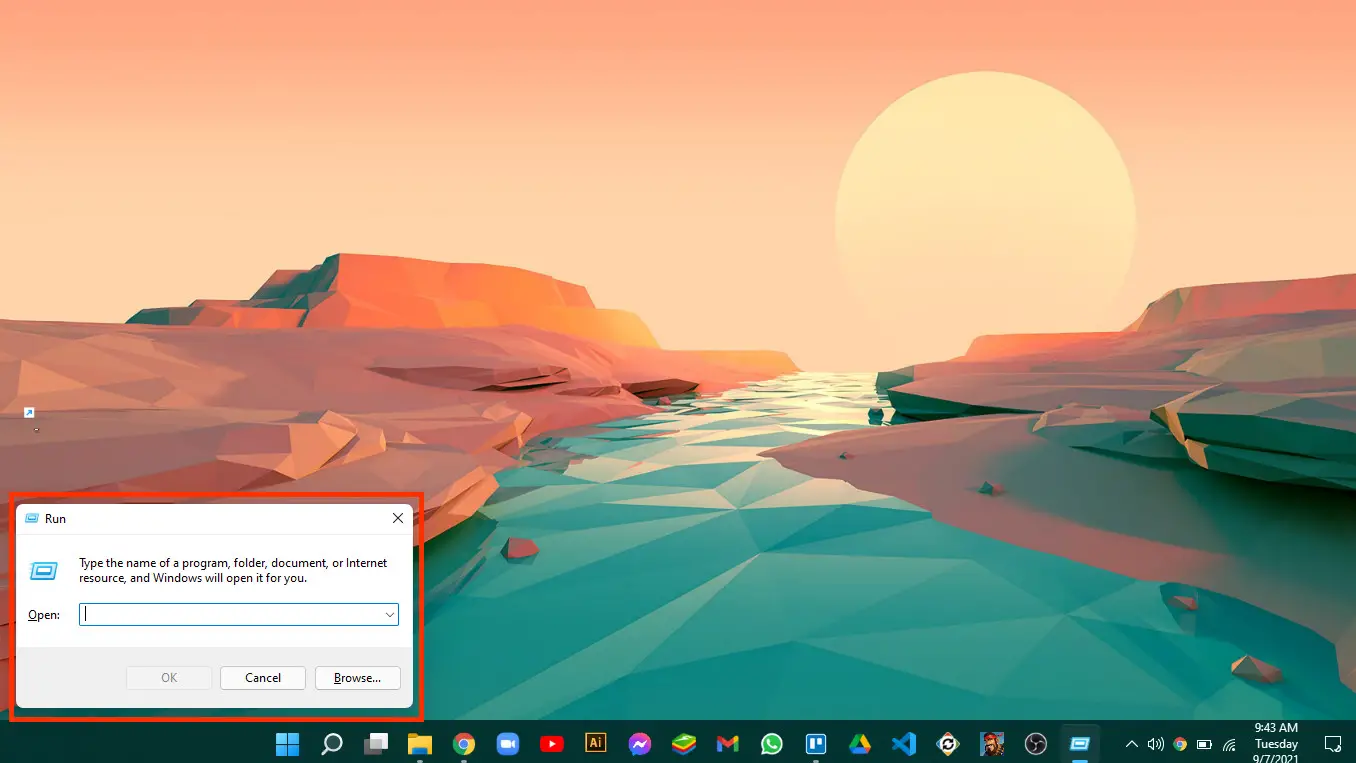
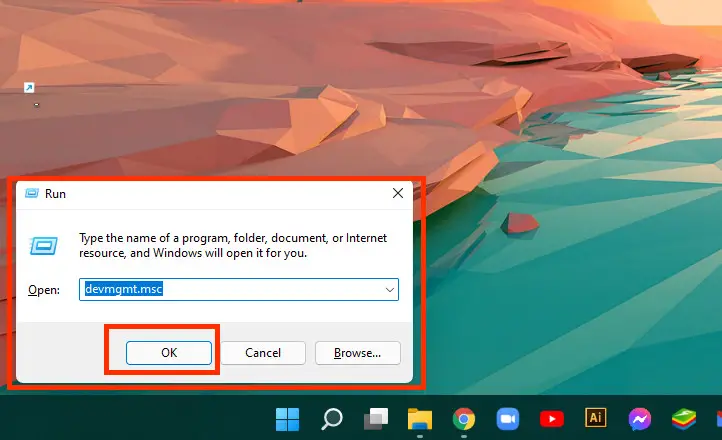
Type “devmgmt.msc” (you could call it a shortcut for device management) in the box you see and press OK.
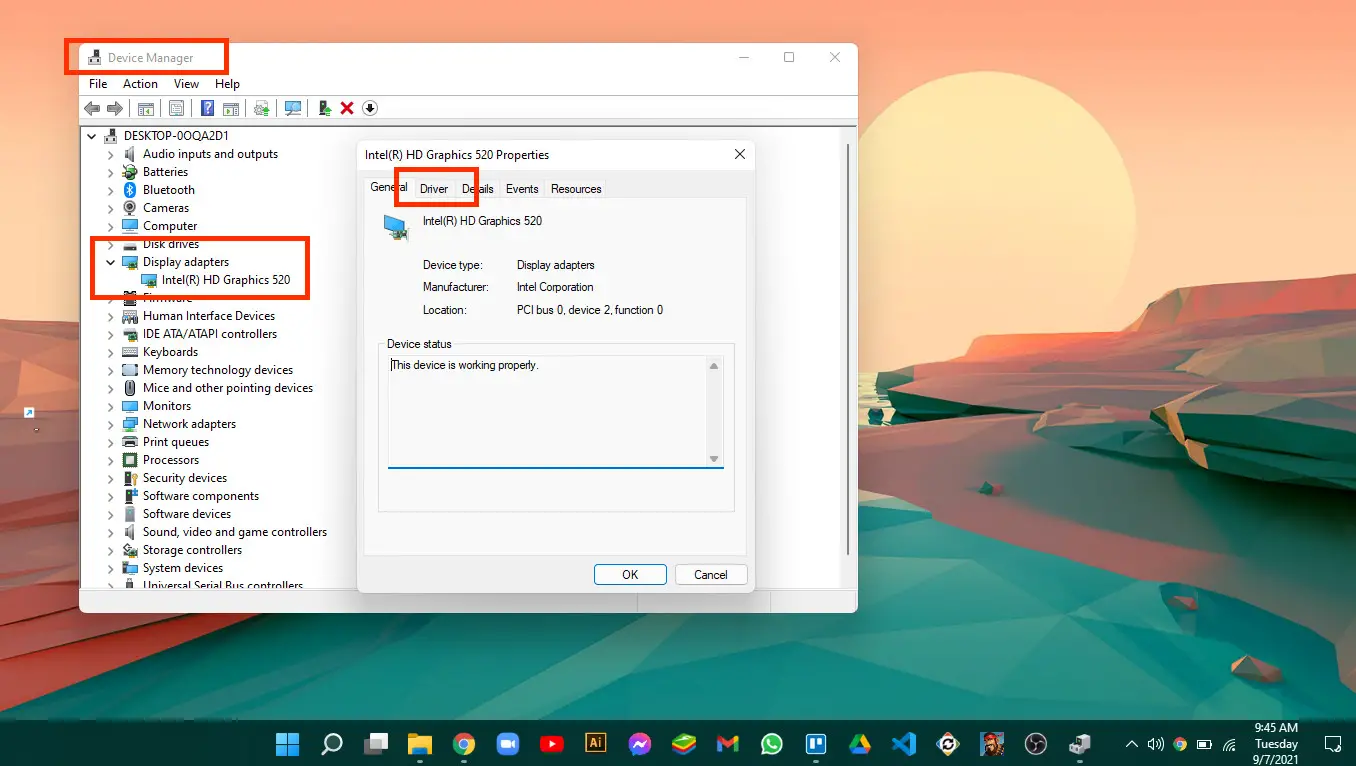
Now click the display drivers into the device manager and it’ll show you the current GPU you’re using.
Now, tap uninstall device and make sure to put a check on “delete the driver software for this device)
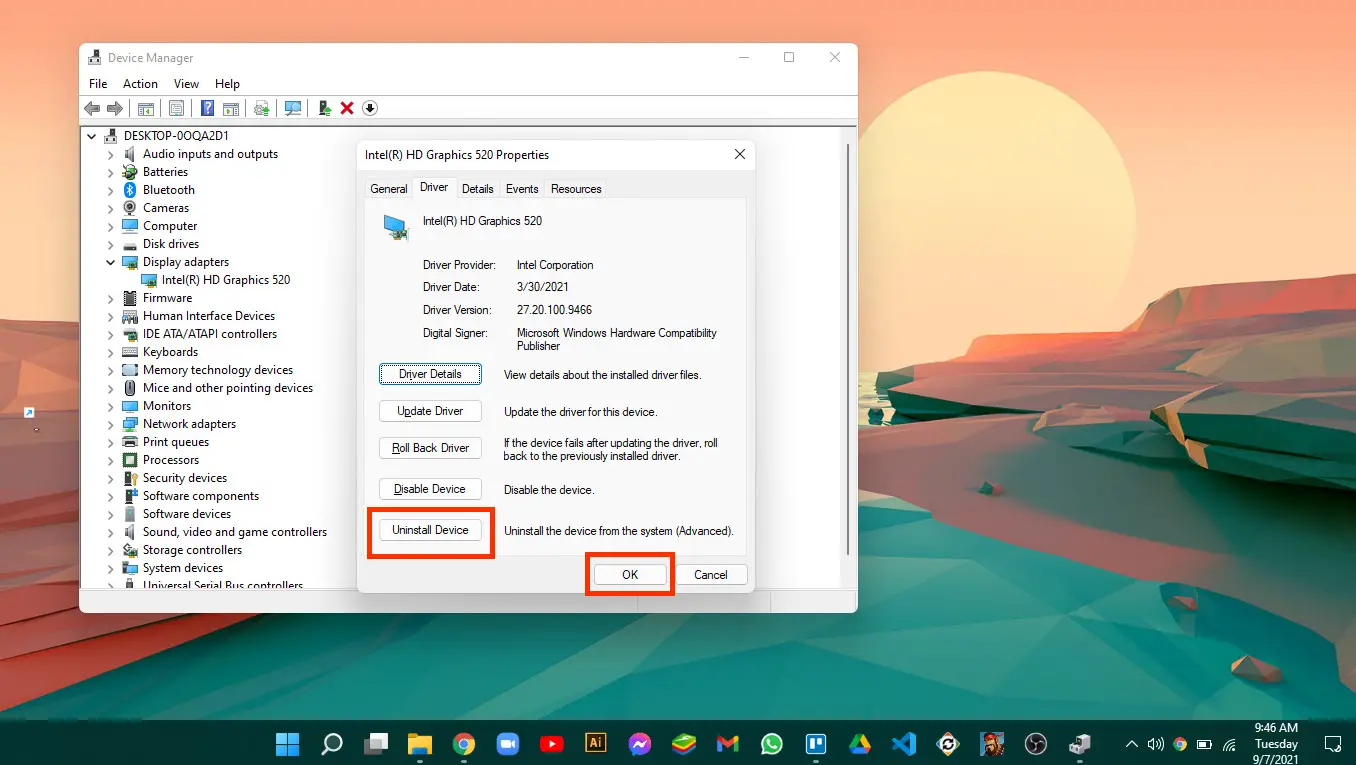
In order for this to take effect, restart your computer.
Note: You can skip this step if you don’t already have a dedicated GPU on your computer.
2nd note: Don’t get freaked out by the changes in the display resolution you may see, they are normal as the GPU drivers have been uninstalled.
If you are struggling with laggy & choppy, and you find some real performance dips then here is an amazing article for you: How to Rollback GPU Drivers.
That said, here’s what to do next.
Shut Down the PC

Once you’ve successfully uninstalled your GPU drivers from the computer, it’s time to shut it down. I think I don’t need to tell you how to do that, do I?
Do you have your PC shut down automatically at times? Learn what are the 10 main reasons for PC to shut down automatically with our guide.
Hit the Switch on the Back of the PC to Turn off Supply to the PSU
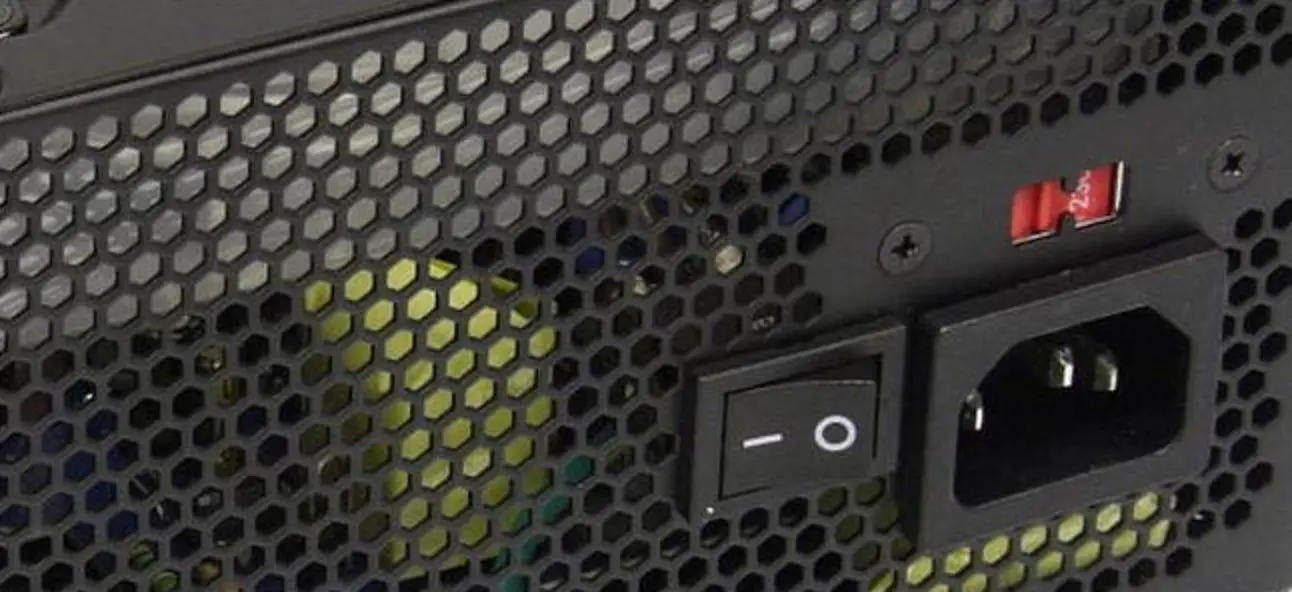
On the back of the PC, near the power cable, you might see a small button. It switches off the power of the PSU and the computer. Hit this switch and turn off the power supply.
Note: Some computers do not have this sort of button. If that’s your case, consider disconnecting the power cable.
Done disconnecting the power supply to the computer? Here is what’s next:
Remove the Side Panel (Usually Held on by Two Screws on the Rear)

The side panel of your computer must be removed to install the new GPU. The extraction of the side panel is different for PC cases. However, a common way is to unscrew the 2 screws of the side panel and slide the panel back.
Note: If you’ve got a different PC case and don’t know how to remove it, consider watching a video on Youtube by searching for your certain computer case.
Remove the Screws Holding the GPU in on the Rear Bracket
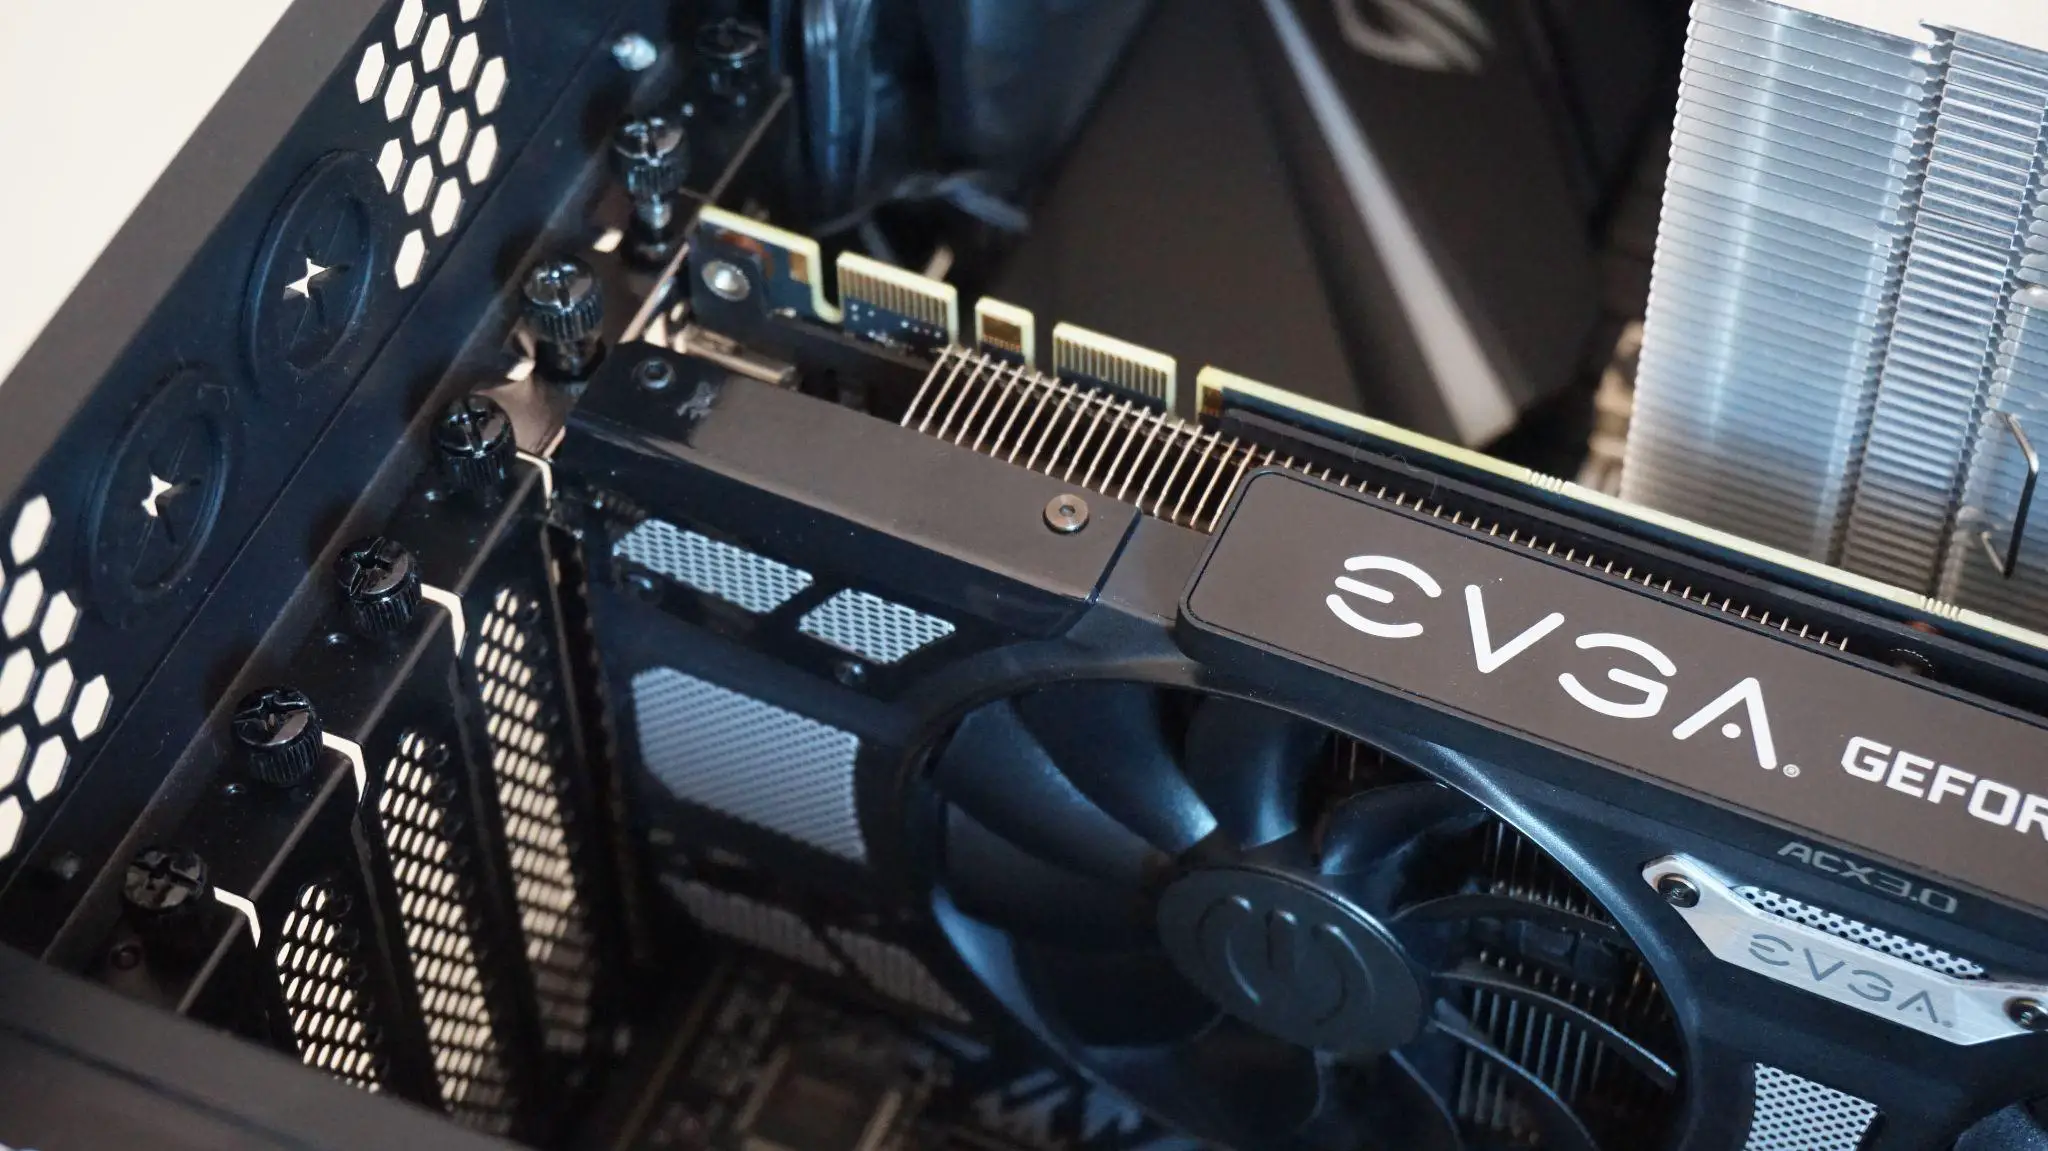
Once you’re successful in removing the PC side panel, remove the screws that are holding your current GPU in on the rear bracket. The image might help:
Note: Some old computer cases don’t have these screws, they rather have a simple lock that requires some sliding.
Remove the GPU Power Connectors
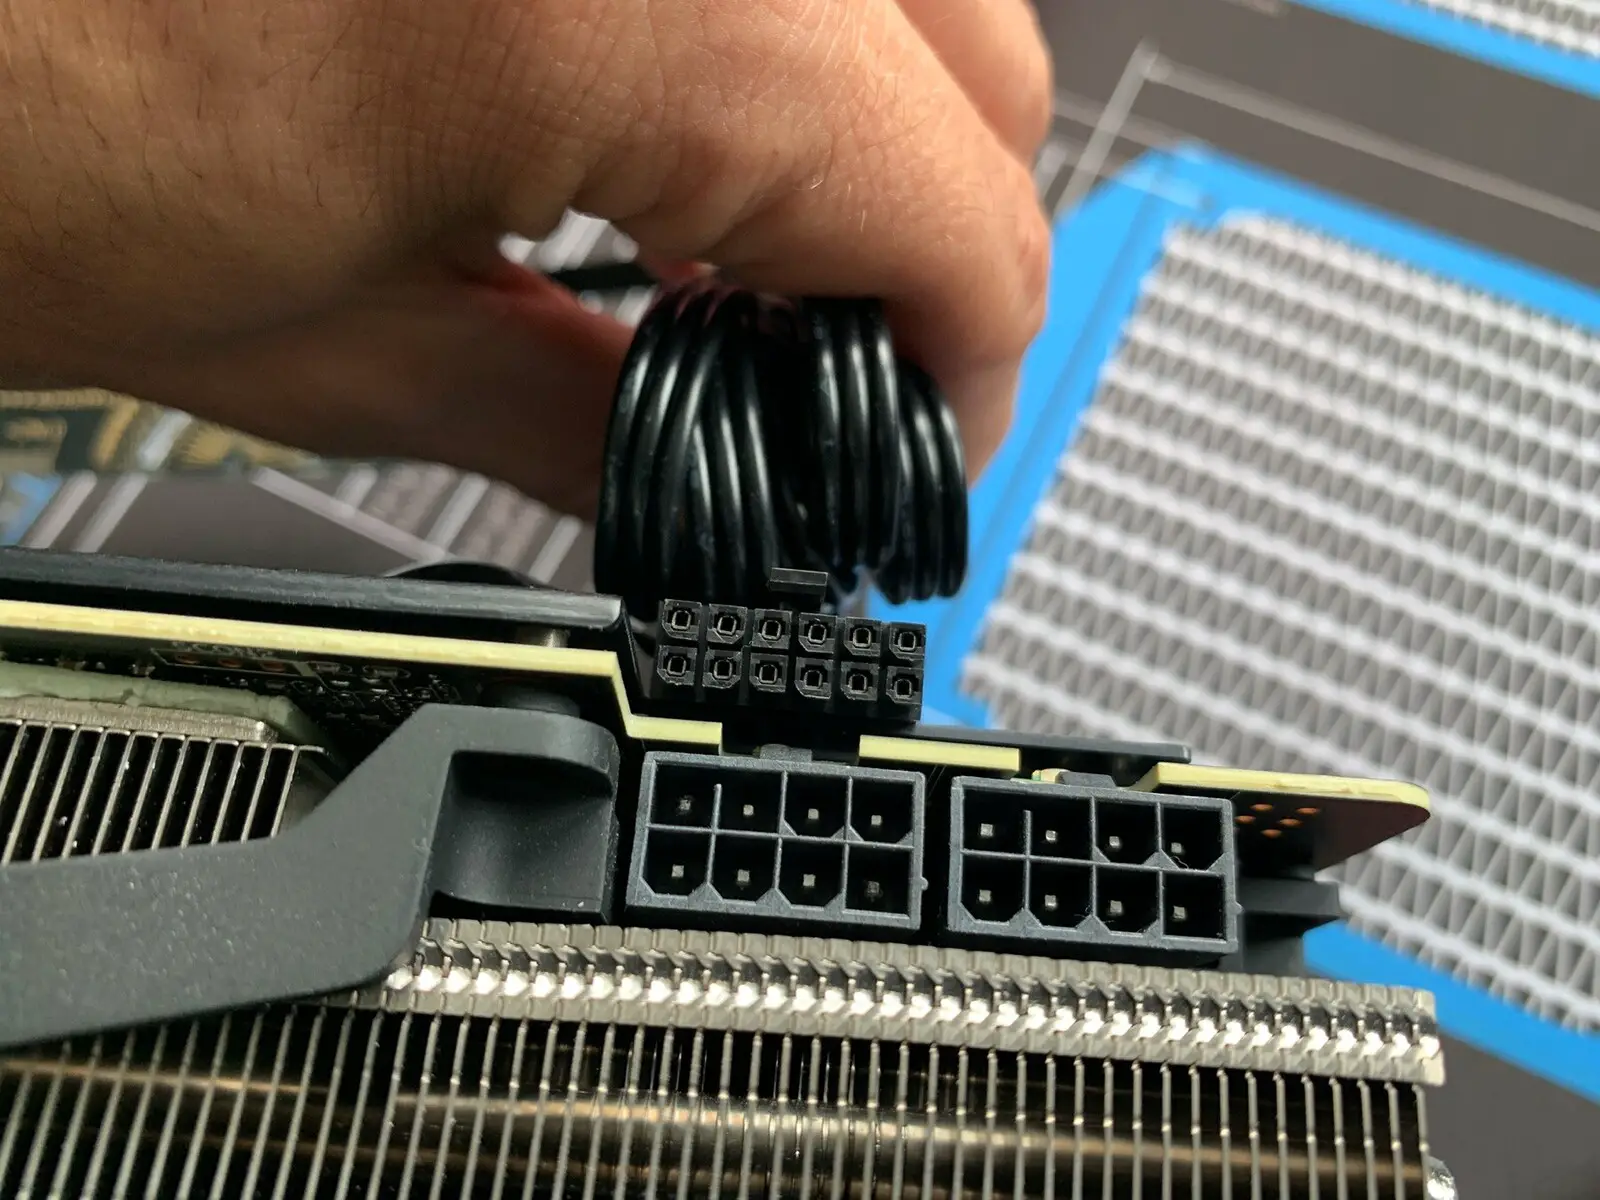
If your GPU uses external power from the motherboard, you might see a wire connected to the GPU and a header on the motherboard. All you need to do is disconnect it from the GPU.
Note: Skip this step if your current GPU doesn’t have external power connectors or if you don’t have a dedicated GPU currently.
Unlock the PCI-e Slot Clip
The next step is to unlock the PCI-e slot clip. While it may seem to be, unlocking the PCI-e slot clip isn’t technical, as illustrated in the image. All it requires is putting gentle pressure in the right direction.
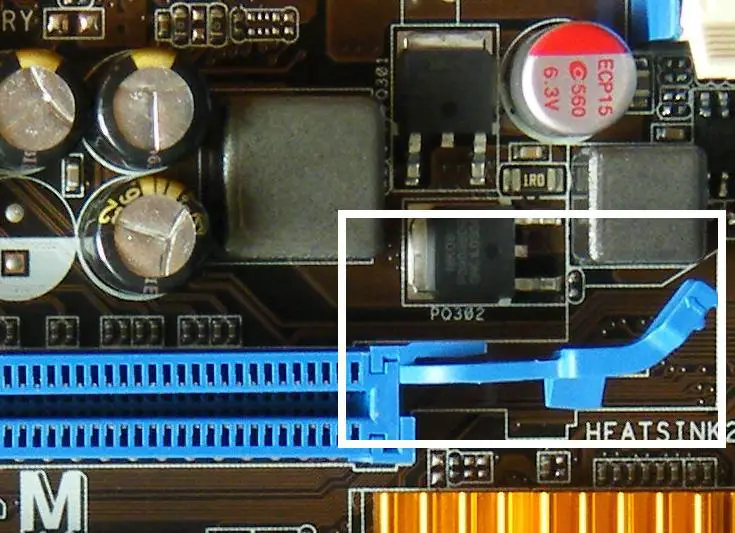
Note: Skip this step if you don’t have a dedicated GPU.
Remove the GPU by Lightly Pulling on the Graphics Card
Once you’ve unlocked the PCI-e slot clip, it’s time to remove the current GPU by lightly pulling it out. When doing so, try not to put your fingers on the sensitive parts of the GPU like the fan.
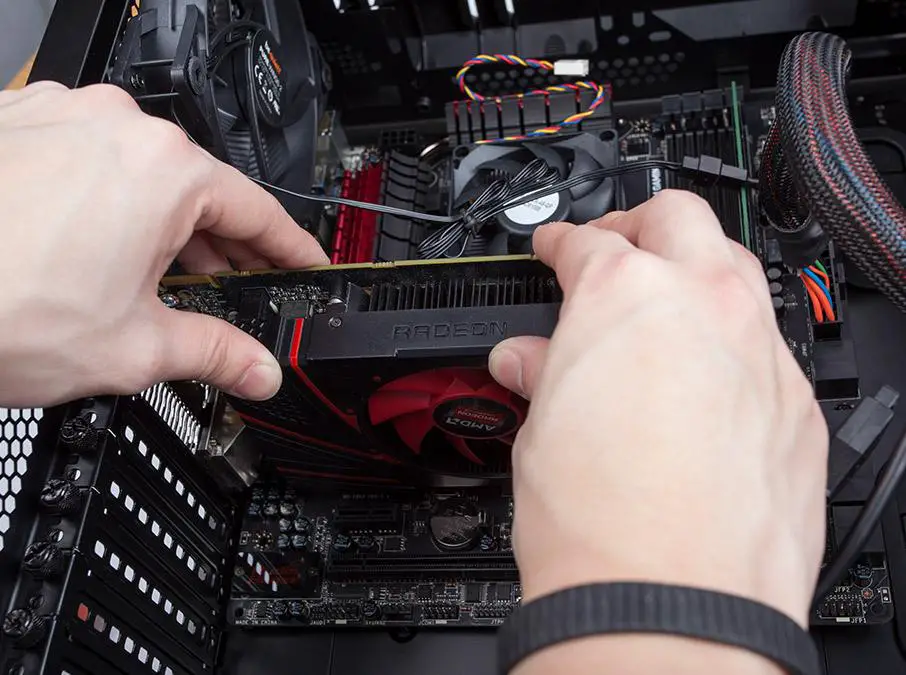
Don’t have a dedicated GPU? Skip this step.
Tip: Try not to put intense pressure if the GPU is not coming. Rather, make sure the PCI-e slot clip is unlocked. Also, take a look around the GPU and make sure there is no blockage.
How to Install the New Graphics Card
Hooray! Your PC is all set up to install the new graphics card and test the new games you’ve been waiting to play.
Willing to learn how to check the graphics card compatibility? Here’s a definitive article for you showing exactly how to graphic card compatibility.
Pro tip: Many of the steps to install a new graphics card are opposite to the ones you followed to remove the previous GPU. Hope it helps 🙂
However, follow these simple instructions to install your new GPU:
Hover the New GPU Over the PCI-e Slot
Right where you pulled the previous GPU out from, put your new GPU here on the PCI-e slot.
Push Down on the GPU to Slide the Connector Into the Slot
Now, push the graphics card down to slide the connectors into the slot.
Ensure the Security Lock Click Into Place
Now, make sure the security locks have been closed.
Screw the Rear Bracket Down to Secure the Card to the Chassis
Now, lock the rear bracket screws back up to secure the card to your PC case.
Connect Any Required PSU Cables
Once you’re done with placing the GPU into the case accurately, connect the required power connectors (if your GPU requires them).
Reattach the Side Panel
Now, reattach the side panel of your PC case that you had opened and lock up the screws.
Install the Required Drivers for Your New GPU
Once you’re done with all of that, it’s time to install the required drivers for your new graphics card.
- Have an AMD graphics card? Search for the drivers here.
- Have an Nvidia GPU? Search for the drivers here.
Pro tip: Install the latest drivers available for your card for maximum compatibility and performance.
Note: To turn on the computer for installing the drivers for your new GPU, you can use the GPU ports for display.
Also, I wanted to clear up a frequent query “Will the GPU work without installing the drivers?”
Well, as a piece of hardware, the GPU will not work unless you install the GPU drivers. Although it will give the display, you won’t be able to get the graphics performance it has. Only installing the drivers will make it give its graphics performance.
Frequently Asked Questions
Got questions regarding how to replace your GPU or how to install a new graphics card on your computer? Well, here are some answers to the frequent queries regarding that.
How to install an Nvidia graphics card?
To install an Nvidia graphics card, open your computer case, unscrew the rear bracket, unlock the PCL-e lock, and replace your current GPU (if any) with the new Nvidia card. Now, close your computer backup and install the latest Nvidia graphics drivers.
How to connect multiple GPUs for mining?
Open your PC case, unscrew the rear bracket and insert the first GPU into the slot. Repeat the process for the second card. Make sure you have sufficient space for two cards on your PC. Now, connect the power connectors to the GPUs and install the graphics drivers to run them.
How to install a second graphics card?
To install a second graphics card, but the second GPU onto the slot and press it firmly until it locks up. Now, connect the power to it and link the cards together by either CrossFire or SLI. Make sure you use the same cards as different cards cannot be linked together.
How to install a new graphics card on a laptop?
To install a new GPU on your laptop, uninstall the current graphics drivers, remove the old graphics card (if a dedicated one), install the new graphics card as well as its drivers. But before you do that, make sure the new GPU is compatible with your laptop.
Is the GPU support bracket necessary?
Many of the performance-packed GPUs are heavy enough to require a spare bracket. Although some of them offer properly distributed weight to not cause an issue, it’s recommended to use a GPU support bracket if your GPU is really heavy.
The Final Say
Installing a new GPU seems like a daunting task with drivers to take care of, protection of the GPU to look after, and all that. But worry not, this guide shows you exactly how to install a new GPU on your computer.
The action steps are:
- Remove the current GPU drivers, turn off the PC, and remove the current GPU (if any).
- To install the new GPU, put it on the PCI-e slot, close up the PC case back, and install the drivers for your new GPU
With that said, I hope this guide helped you find the answer to your queries. If it did, consider sharing it with other people who could be struggling with determining how to install a new GPU on their computer.