
So, you’re unable to find the Radeon control panel and wondering how to open the AMD Radeon. So, really, how to get an AMD Radeon control panel on your computer?
An easy way to open AMD Radeon settings on your PC is by doing a right-click on the desktop and simply clicking the “AMD Radeon Settings” option — present on the top, generally. But, the option isn’t visible in all cases.
Without further information, let’s get right into it.
Also read: How to enable AMD Crossfire
How to Open AMD Radeon Settings?
Follow the steps below to open AMD Radeon settings on your computer:
- Head over to the desktop and do a right-click
- Click the option “AMD Radeon Settings”
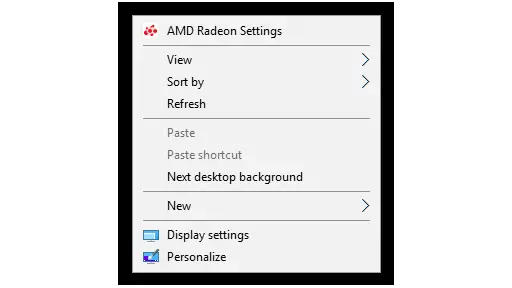
- That’s it — it will open up the AMD Radeon control panel
But, unfortunately, this option is not visible all the time.
So, below are some alternative ways that will definitely lead you to an AMD Radeon control panel — as long as there’s an AMD GPU on your computer and you have AMD Radeon Graphics drivers installed on your PC.
Click on AMD Radeon Settings in System Tray
System tray usually includes all the major apps running on your computer. Here’s how you can use the system tray to access AMD Radeon settings:
- Click on the arrow on the right lower corner of your computer
- Look out for the logo of AMD Radeon Settings and click on it
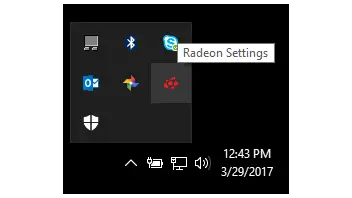
- That’s it the AMD control panel will open up
Note: Sometimes, the icons are right up front and you don’t need to click on the arrow sign
Note 2: To access the system tray, make sure the taskbar is visible and not hidden
Note 3: If you don’t find the AMD Radeon icon anywhere, it means the app is not properly installed on your computer or not working — but not always.
In fact, it could also be turned off from the AMD Radeon settings to appear on the system tray. Here’s how you can deal with such a situation:
How to Enable the AMD Radeon Settings Icon in the System Tray
- Right-click on the desktop
- Open AMD Radeon Settings
- Click the Preferences tab in the lower-left corner
- Tick the box on Enable System Tray option and save the settings
- That’s it — AMD Radeon Settings start to appear in the System tray
That said, here’s another method you can consider to get to AMD Radeon control panel:
Access AMD Radeon Panel Through Start Menu
The start menu is a powerful place to find any installed software you want to access. You can access it in many different ways. Below are a few of them.
Method No. 1: If you’re on Windows 7 or Windows 10, you can follow these steps to open AMD Radeon Settings using the start menu:
- Click the icon of Windows at the left lower corner
- Search for AMD Radeon panel
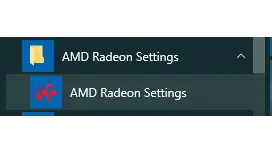
- Click on it and that’s it — it’ll open up
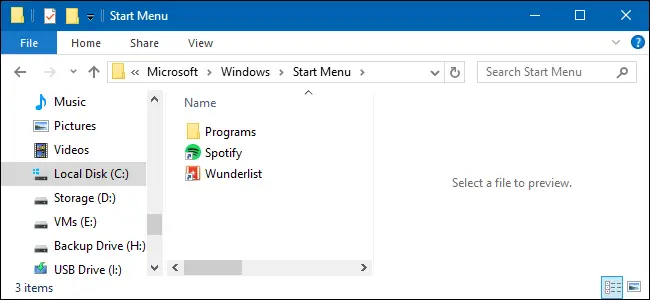
Method No. 2: You can always access the start menu from My Computer — here’s how to do that:
- Open My Computer
- Navigate to the following directory:
C:\ProgramData\Microsoft\Windows\Start Menu
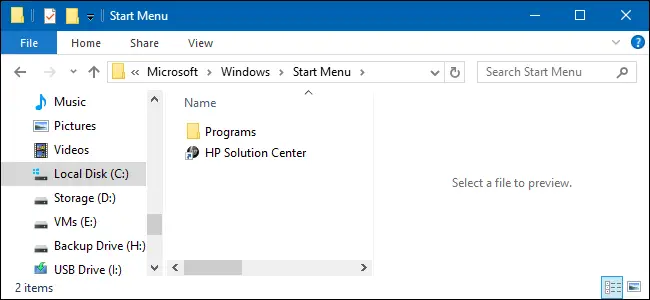
- Look out for AMD Radeon Settings and open it up
Note: The provided directory is for the global start folder which is for all users on the device. For the personal Start folder, use the following directory instead:
%appdata%\Microsoft\Windows\Start Menu
How to Fix “AMD Radeon Settings Won’t Open?”
To fix a certain problem, it’s important to find its cause. So, let’s take a look at the common causes of AMD Radeon Settings not working.
What Causes the AMD Radeon Settings to Not Open?
Below are the major causes of AMD Radeon Settings not working:
- Faulty drivers — updating or rolling back the drivers could help
- Availability of a new operating system — installing the updating system (possibly Windows) update could fix the issue
- Different versions of AMD Radeon Settings and Radeon Graphics — registry editor can be used to fix the issue
With that said, let’s explore the solutions to the problem:
Method #1: Install an Older Version of the Driver
The easy way to overcome faulty GPU drivers is by installing an older version. However, note that this method works well when you already have the latest version installed.
Follow the steps below to install an older version of graphics drivers:
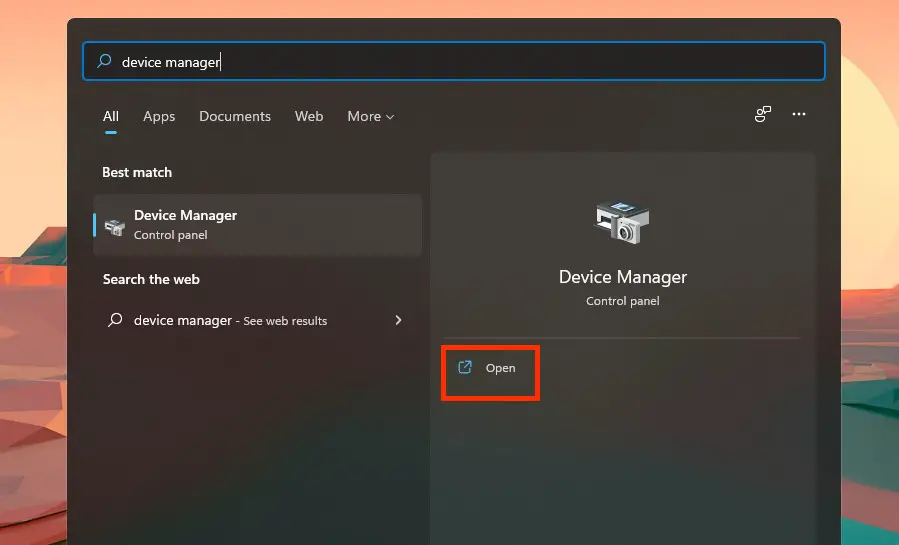
- Click the start menu on the lower-left corner and search for “Device Manager”
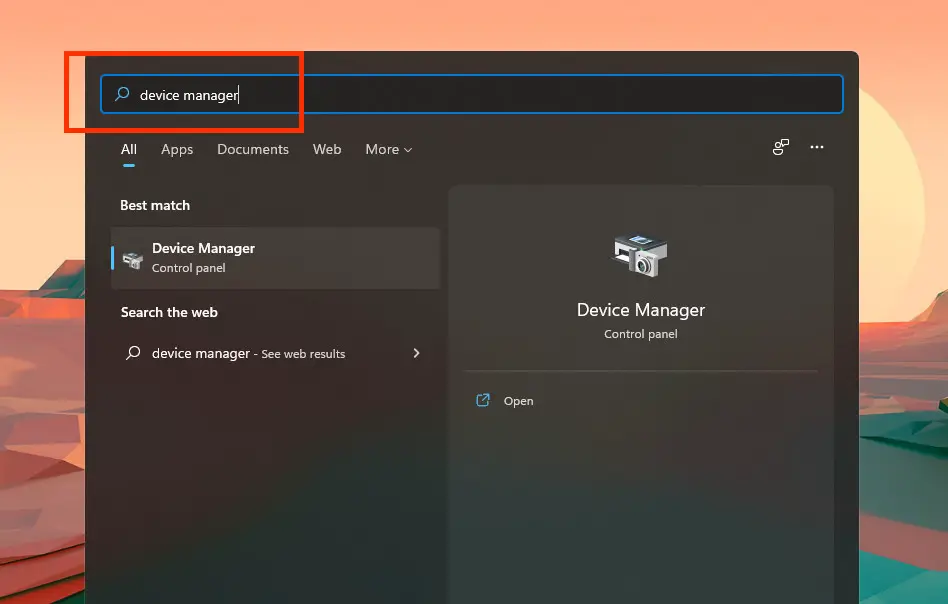
- Open “Device Manager”
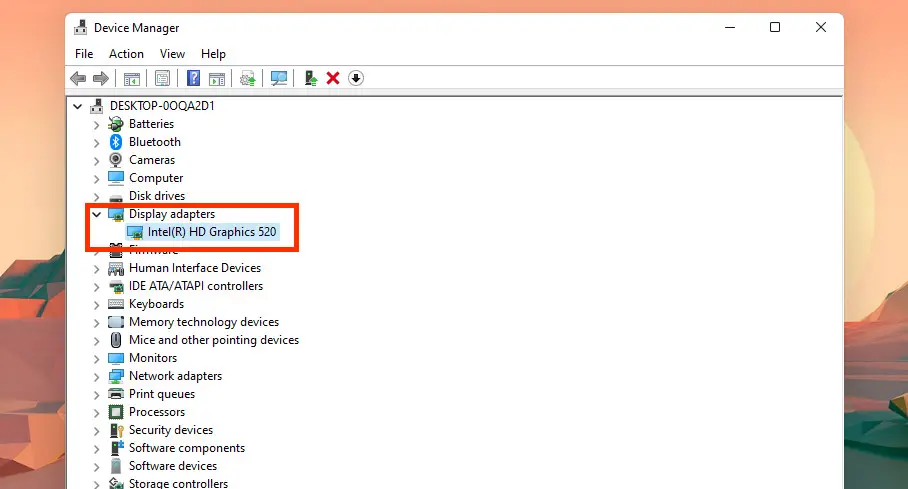
- Navigate to “Display Drivers” in Device Manager
- Click the drop-down of Display Drivers and right-click on your GPU

- Click uninstall the device (don’t worry — it won’t cause a problem)
- Wait for the process to complete
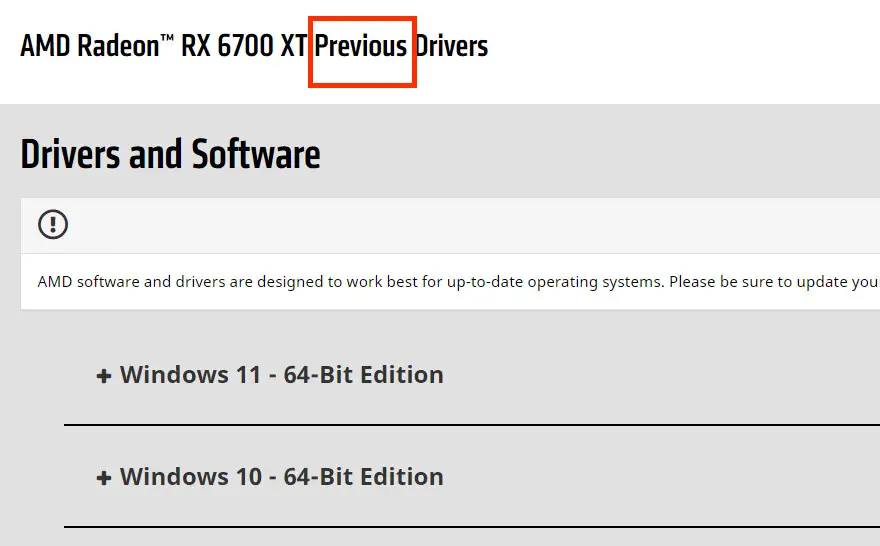
- Search for your graphics drivers on AMD’s official website and click on the older version
Below is an example:
- Download and install it
That’s it —it fixes the issues in most cases
Note: An alternative way to open device manager is by pressing Windows Key + R key combo and writing the command devmgmt.msc in the Run dialog box that comes up. Now, click Ok and it will open up the device manager.
Looking for detailed information on how you can rollback (install the previous version) of graphics drivers? Go through our detailed guide on how to roll back GPU drivers for that.
Method #2: Update the Operating System
Keeping the operating system up-to-date is important for compatibility, functionality, and security. Sometimes, an outdated operating system can lead to corrupted drivers.
If you’re not sure, Windows and Mac are operating systems. Here’s how you can update Windows on your computer/laptop:
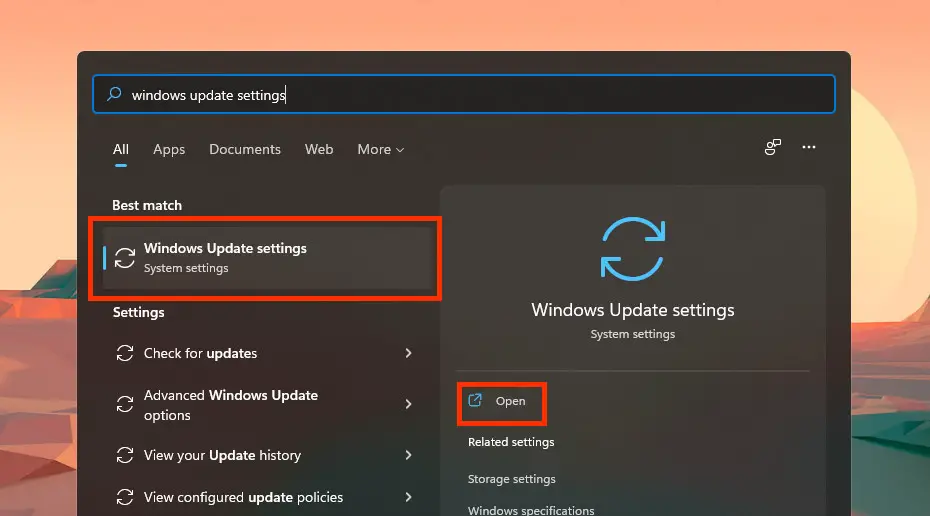
- Search for Windows Update Settings and open them
- Make sure the updates are not paused
- Click “check for updates”
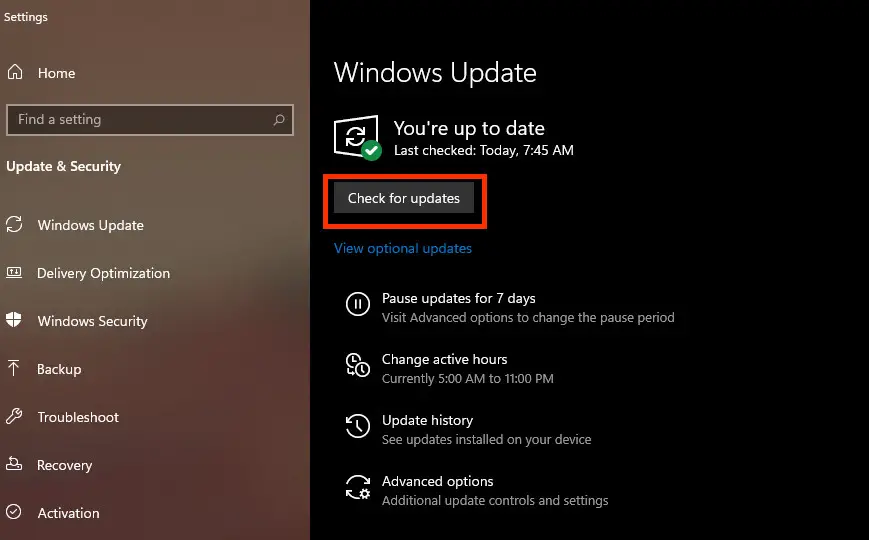
- Windows will check for updates and let you know if an update is available
- Click “install update” and wait for it to install
- Updating Windows automatically installs the latest versions of other programs generally
Method #3: Change a Registry Key
In case that the AMD Radeon settings version and the graphics card driver’s version don’t match, changing the registry key helps. In this method, we change the registry key of one of the programs to make their versions match.
Follow the steps below to change a registry key:
- This method requires deleting the registry key first, so, it’s recommended to back up your existing registry key to avoid issues. Anyway, here’s what to do afterward…
- Use Windows Key + R key combination when on the desktop and the run box will open.
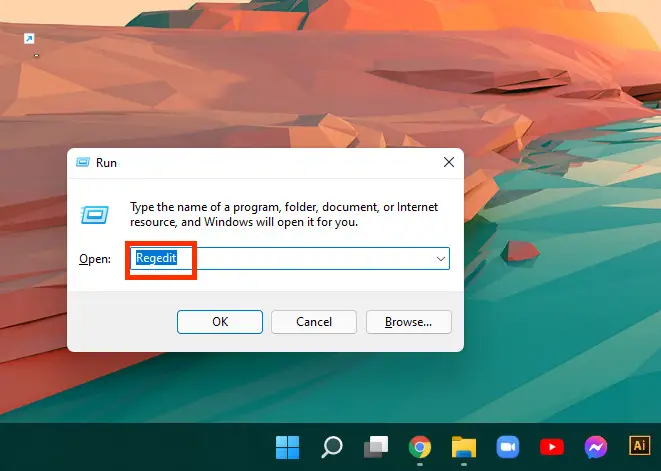
- Now, put the following key and press enter — it will open the registry editor.
“Regedit”
- Once the registry is open, navigate to the following directory:
“HKEY_LOCAL_MACHINE\SOFTWARE\AMD\CN”
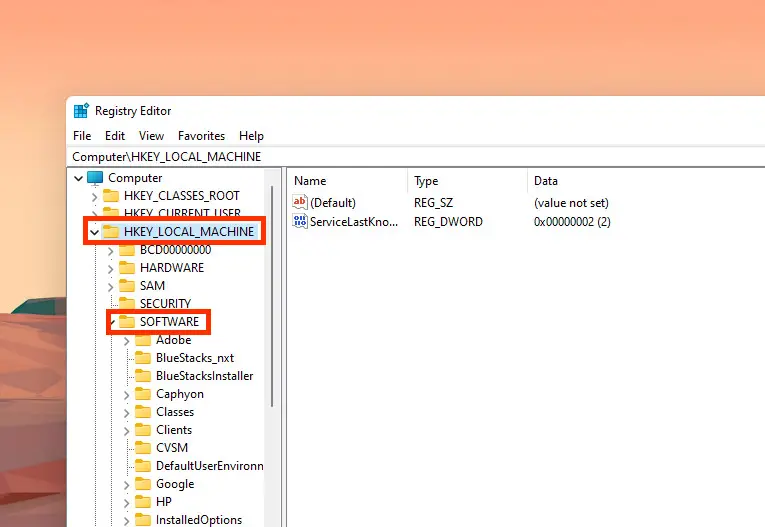
- Now, click on this key and navigate to an entry called DriverVersion and choose the modify option from the menu.
- In the opened editing window, change the value to 0. Now, click apply and confirm the security dialogues.
- Now, it’s time to end all the AMD-related processes running in the task manager. You can open it using the combination “Ctrl + Shift + Esc key”.
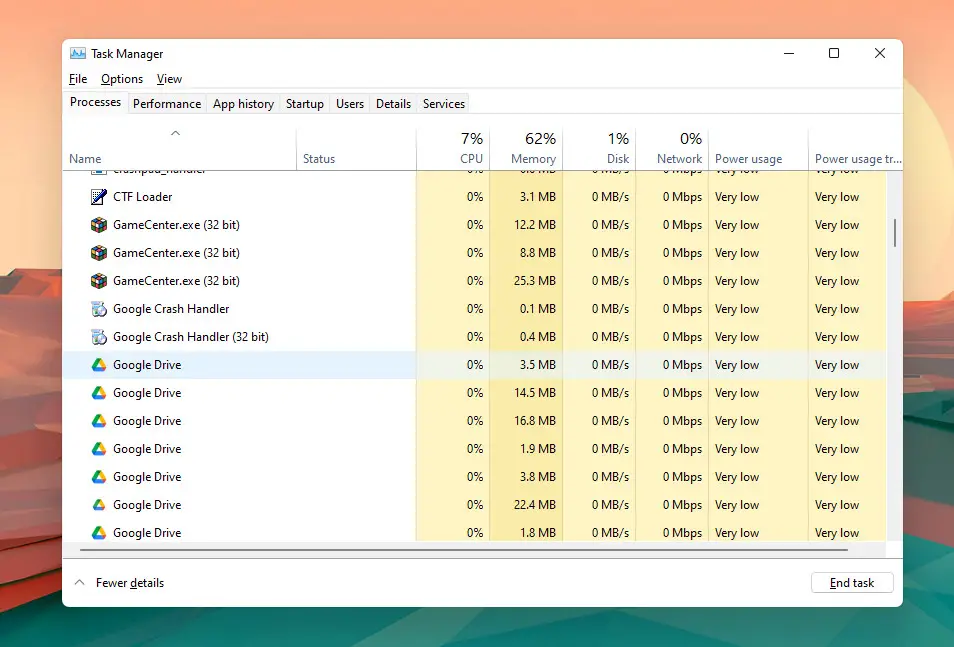
- If you’ve never used it before, click the More details option on the lower-left corner and search for AMD-related processes, right-click on them one-by-one, and click end task on all of them.
- That’s it, try running the AMD Radeon Settings now, it’s better to reboot your computer first.
Method #4: Uninstall the Onboard Graphics Card Drivers
Sometimes, the problem is caused by the interference of the onboard graphics drivers. User experiences reveal that uninstalling onboard graphics drivers is effective for the simultaneous operation of AMD Radeon Graphics and Settings.
Here’s how you can do that:
- Search for “Device Manager” in Windows
- Open Device Manager on your computer
- Click the drop-down of Display Adapters, right-click on the onboard graphics card, and click “uninstall”
- That’s it — try running AMD Radeon Settings now and they might work fine.
Frequently Asked Questions
Below are the answers to frequent queries on how to open AMD Radeon Settings:
How do I open the AMD Radeon menu?
Follow the steps below to open the AMD Radeon menu:
- Right-click on the desktop
- Click on AMD Radeon Settings on the top of the context menu
- Alternatively, you can click on AMD Radeon Settings in System Tray
- Another alternative is to open it from the Program Menu
Can’t open AMD Radeon settings?
Below are the major solutions for the “AMD Settings won’t open” issue
1. Rollback the GPU drivers (install an older version)
- Change the registry key to match Radeon driver and Radeon settings versions
- Update Windows (or whatever operating system you’re using)
- Uninstall the onboard graphics card drivers
What happens if you uninstall the graphics driver?
If you’re wondering whether the display will stop working on uninstalling the graphics drivers or not, well, don’t worry, it’ll keep working. Windows is set to revert graphics to the standard onboard graphics drivers — the same that was used during OS installation.
Final Words
This article breaks down a definitive guide on how to open AMD Radeon Settings.
We’ve covered everything from the simple ways to open AMD Radeon Settings on your computer to slight fixes and complete troubleshooting of the “AMD Radeon Settings won’t open” problem.
We hope this guide helped you find a solution to your problem — if it did, consider sharing with your friends who also use AMD Graphics, it might help them if they encounter the same problem.
With that said, here are some other relevant guides you might want to go through:
- Learn how you can combine the power of multiple AMD cards for performance-boosting with our guide on how to enable AMD Crossfire?
- Find out how long GPUs last and how you can make them last longer with our guide on how long do video cards last
- Wondering if your GPU is working fine or not? Go through our guide on how to tell if your GPU is functioning properly for detailed information
- Not sure what is a good temperature for AMD GPU and what’s too much? Skim through our guide on what is hot for a GPU to learn all about that.