Without a doubt, a graphic card is an integral part of a gaming PC.
A significantly large responsibility of delivering high-quality graphics on your PC or laptop while gaming depends greatly on the GPU model which you’re using.
While putting together a custom desktop built, you may have plenty of room to choose from a variety of different GPUs, you may not have the same liberty when using a laptop.
That’s because laptops have a preset configuration where you may often find a graphics card unit that may underperform on some of the latest gaming titles.
Lucky for us, we now have tools that can help us overclock our GPUs to get that extra juice needed to play our favorite titles. Do you also want to learn how to overclock GPUs on laptops?
Here’s an article to help you learn how to overclock the GPU on your laptop and extract that extra juice to achieve that desired gaming performance.
Things You Need to Overclock Your GPU
So first things first, check the casing where your GPU is housing.
For instance, if you’ve a casing that’s too small in size and packs the GPU completely, then overclocking may not be of much help. GPUs need to exhaust heat when they are overclocked.
Hence, you need a case that is spacious and can provide plenty of room to exhaust.
You can also opt in for a liquid cooling setup if your budget allows it just to keep the temps under control.
Download & Install an Overclocking Tool
Next up, download a GPU overclocking tool.
One may find plenty of overclocking tools on the Internet. And most of them come from some of the renowned GPU card manufacturers. There’s MSI Afterburner, Rivatuner, Nvidia Inspector, EVGA Precision X, ASUS GPU Tweak, Zotac Firestorm and many others.
Most of the GPU overclocking tools have a somewhat similar functionality and only the interfaces differ. However, in our guide, we are going to use the famous MSI Afterburner as it’s quite popular among gamers. Also, it’s a preference as it provides an interactive UI.
If you’re not much of a fan of MSI, then you can choose any overclocking tool of choice.
Download & Install A Benchmark Tool
After you overclock your GPU, the next step will be to apply stress tests and benchmark your GPUs performance. By stress testing your GPU, you will take your GPU performance to its maximum level and see if it’s working smoothly or thermal throttling. While some benchmarking tools offer you a limited time to run a stress test and are free to use. Other benchmarking tools are paid offering an unlimited or longer period to put your GPUs under it.

I normally recommend that you use two benchmarking tools to track your GPUs performance as it will give you a better result. In my recommendation, Unigine Superposition & Unigine Heaven are the optimal choice. Both of these benchmarking tools belong to the same software manufacturer Unigine and offer relatively better GPU performance tracking results compared to other benchmarking tools. The only difference between the two is that Unigine Superposition puts a greater stress on GPU cards which are of the latest models, whereas the Unigine Heaven (which is the older variant) allows you to run stress tests for a long time.
Lastly, to keep track of how much voltage is being consumed by your GPU unit and how many clocks you’ve increased, download CPU Z which will help you learn about both metrics.
Step # 1 Create a Benchmark for Your Stock GPU Settings
Before you initiate the process of overclocking your GPU, it’s best that you find out your stock GPU settings. Power up the Unigine Superposition benchmark tool and identify your GPU’s stock settings. To do so, just set the options from the preset menu to a setting on which you normally play your AAA titles. For instance, if you play games on FHD on high or ultra settings, set the following. Make sure to shutdown Vsync so your frame rate of the card does not collide with the refresh rate of your monitor. Once done, click on the black button saying “RUN.”
It will initiate the benchmarking process. You will see a number of cutscenes appearing. The complete benchmarking process takes a total of five minutes to complete.
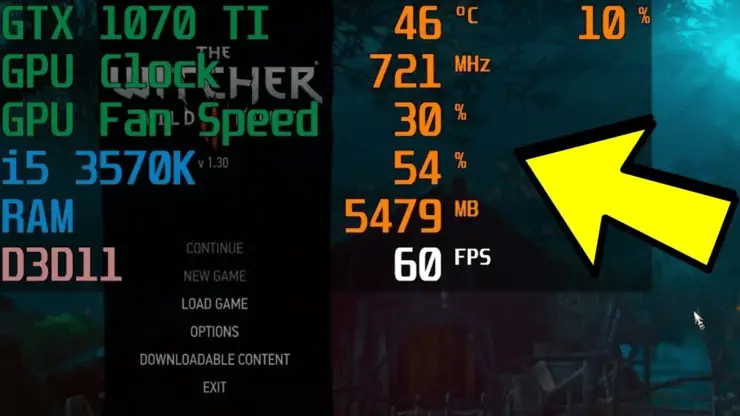
On screen, you will see all the details related to your GPU performance. You will find metrics such as framerate, clock speed, temperature and so on.
Most of these metrics might fluctuate for the cards of the latest models from AMD & Nvidia. But don’t worry, because modern cards adjust boost clocks based on the card’s temperature readings.
You can also monitor the temps during the session. They might not appear to go quite high but once you start overclocking your GPU, you will see the temps increasing as well.
Once the benchmark tool completes the benchmarking process, it will provide you with a final result. Jot down the necessary information required for overclocking your laptop’s GPU.
Step # 2: Increase Core Clock of Your Card Using MSI Afterburner
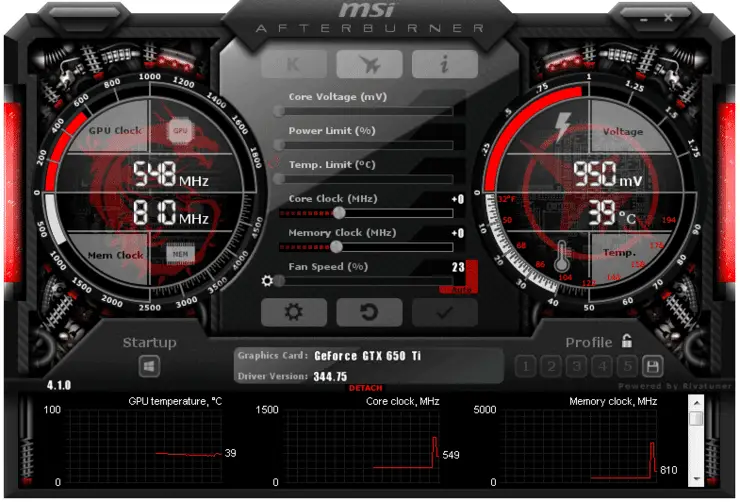
Now run the MSI Afterburner tool which you’ve recently installed on your laptop.
You will see a number of options on the MSI Afterburner such as Power Limit, Temp. Limit, Core Clock, Memory Clock, & Fan Speed.
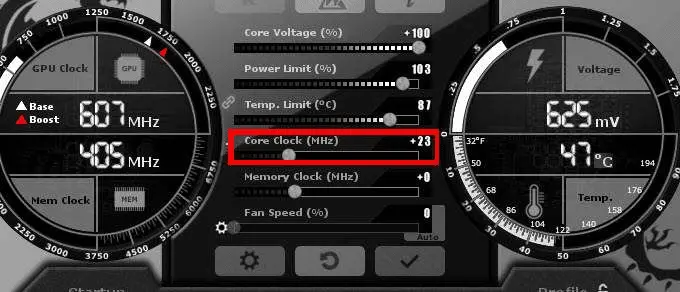
To begin with overclocking your laptop’s GPU, set the Power Limit to max which is 120 volts. Then start by boosting your boost clock up by 10 MHz.
Apply the settings on MSI Afterburner and run a stress test using the Superposition utility. See what the results are. Monitor the temperatures of your GPU as you don’t want to exceed the limit temps. A normal GPU can withstand around 84 degrees without breaking down.
If there aren’t any unusual temperature spikes, then follow the same process.
Keep increasing the boost clock speed by 10 Mhz and keep repeating the process until the software fails. Your system will crash or you will start seeing weird lines or static flash on the screen. When it happens, restart your system and set the core clock speed to the last previous reading. Here’s the maximum stable clock speed your GPU can sustain when overclocked.
Step # 3: To Run the Final Test, Play Your Favorite Game
Have you successfully boosted your GPU, now it’s time to test your GPU on a real game.
Run your favorite AAA title and see how you max out on performance.
Check the results, note down your max in game FPS and compare them with the readings from Superposition. I am sure you will get a much better performance comparatively.
NOTE: When it comes to laptop overclocking, I strongly discourage you to do it without undervolting your laptop because overclocking a laptop without undervolting will lead to high temps which can minimize the life of your laptop unit. At Gear Head, we educate you on how you can undervolt your laptop. So before you begin with overclocking, try undervolting.
Frequently Asked Questions
Is Laptop GPU Overclocking Worth It?
Overclocking your laptop’s GPU can give you a significant boost performance-wise. However, it comes with some serious risks and if not done right, you might end up damaging your video card to a point that you’ll have to replace it with a new one.
Is 3.5 GHz Enough For Gaming?
Yes, 3.5 GHz to 4.0 GHz is considered an excellent clock speed for gaming but you should focus more on a single thread performance. In other words, when you focus on single thread performance, your CPU will be better at understanding and performing single tasks.
How Do I Prevent My GPU From Overheating?
The answer to this question isn’t that simple because it’s all based on what you’re using your GPU for? Are you worried about your card overheating because of overclocking or do you generally want to prevent it from overheating? If it’s general then you can either install fans or opt for a water block and install it on your GPU to keep the temperature down.
Should I Overclock My GPU For Mining?
Yes, overclocking GPU for mining can boost your profits to a whole other level but you shouldn’t push your card too far or else you’ll end up damaging it. Just be careful when overclocking your GPU and keep it all balanced.
How Hot Should My GPU Get When Overclocking?
You have to keep the temperature of the card in check and it should be around 80-85°. Anything beyond this figure means that your GPU is at a huge risk of damage and it might even start throttling which isn’t a good sign.
Conclusion
Now that you know how to overclock your laptop GPU, it’ll be easier for you to do that without damaging the card. Being careless with the processor setting the bar too high when overclocking your GPU, can cause significant irreversible damage to the card.
So to ensure that everything works fine and that your GPU doesn’t overheat, just follow the above-mentioned steps and see how things work out for you.