Graphics card is an integral part of any personal computer. Whether you’re a tech/gaming enthusiast or someone who has installed a graphics card for video editing, there’s always that time of the year when you start thinking about upgrading your existing graphic unit to a more advanced one.
But when it comes to making the right choice, we often find ourselves overwhelmed thinking about how we will remove it. It gives us the jitters to think about removing the side panel and playing around with delicate PC components.
After all, replacing graphics cards is not a piece of cake.
It requires careful handling.
Are you someone who is struggling to answer “how to remove graphics card from PC”? Here’s an article to help you learn the right way of removing your graphics card in five simple steps.
How to Remove Graphics Card From PC: 5 Simple Steps
Follow these simple steps to learn how to remove graphics cards from your PC.
Step # 1: Uninstalling the Graphics Card Driver
Finally, make up your mind on which graphic card are you going to purchase? Well, next up is coming with a way to remove the old one. But before you do so, understand that you need to make sure your graphic card’s connection is permanently severed from your PC. And it not just indicates that the connection must be cut off on the hardware and software levels.
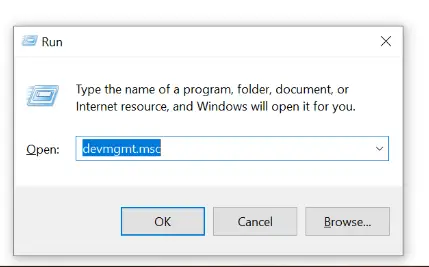
Every GPU unit is connected to the system digitally through a software component called the driver. While it is not mandatory to remove the driver before disconnecting the GPU, it is still advised to remove it before replacing the graphic card in order to avoid any driver conflicts. The conflict usually arises when you change your GPU brands from one renowned brand to another.
To uninstall drivers from your system, you will need to access the RUN command on your PC. The Run Box will appear once you press the Windows button on your keyboard with the R key button together. As soon as the Run Box appears, type in “devmgmt.msc” which will automatically open the Device Manager on your system’s screen.
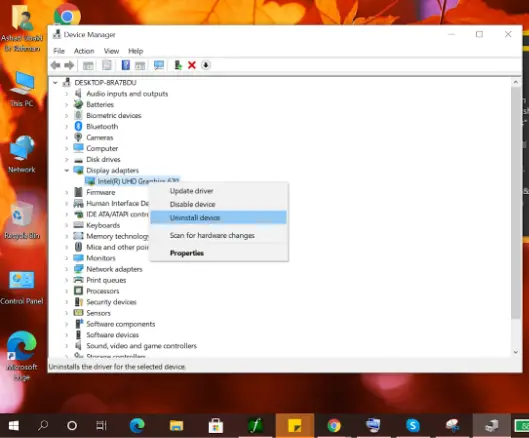
Now locate your graphic card unit in the device manager screen and “right-click” on the installed GPU driver. From the list in the drop-down menu, simply choose the “Uninstall Device” option.
Step # 2: Remove All Charges of Static Electricity
Once you have successfully uninstalled the driver, next up is to make sure there’s no static electricity present in your current PC build. In order to make sure of that, you need to completely discharge your PC. What is static electricity? It’s a very small amount of electric current remaining within the system when it’s powered off or disconnected. This small amount of current can be a leading cause of making your PC unit non workable. It can end up frying one of the essential components in your GPU or elsewhere in your CPU.
Want to know how to discharge remaining static electric current from your system? Here’s how to do it.
- Switch off the power supply
- Press and hold the power button on your PC for few seconds
- It will clear up any residual power left in your PC
- Lastly, unplug all the connections from your CPU and remove it
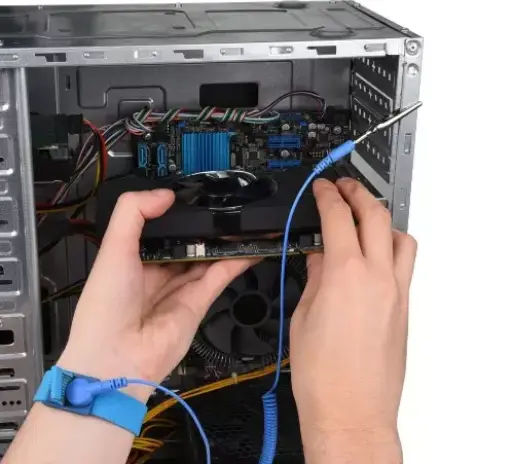
Step # 3: Wear an Anti Static Wrist Wrap
If you want to work safely with electronic components, a wrist wrap for stopping static current is the answer to your problem. After all, you don’t want to experience any jolts of electric current running through your veins upon coming in contact with the system. Neither do you want any of the static electric current built up in your body to transfer into the system and make it non workable whatsoever.
The strap is a small component with a wrist band type area which encloses around your wrist easily. While one end of the strap firmly grips your wrist, the other end has a clip attached which you can clip up at any point on your PC. When detaching your current GPU make sure to firmly attach the wrist wrap and then proceed forward with the GPU removal.
Step # 4: Remove the Side Panel of PC
Once you’ve successfully disconnected the power cables from your PC, it’s now time to remove the side panel. There are two side panels on every computer case; one side panel is normally fixed while the other side panel can easily be removed. Two screws or clamps hold the removable side panel, so to remove the side panel, you need to remove the screws initially.
Has it been a while since you last opened your PC unit? If yes, then you will find dust bunnies in abundance. It’s advised that you dust and clean your PC unit then and there because who knows when you will consider re-opening the back panel of your system.
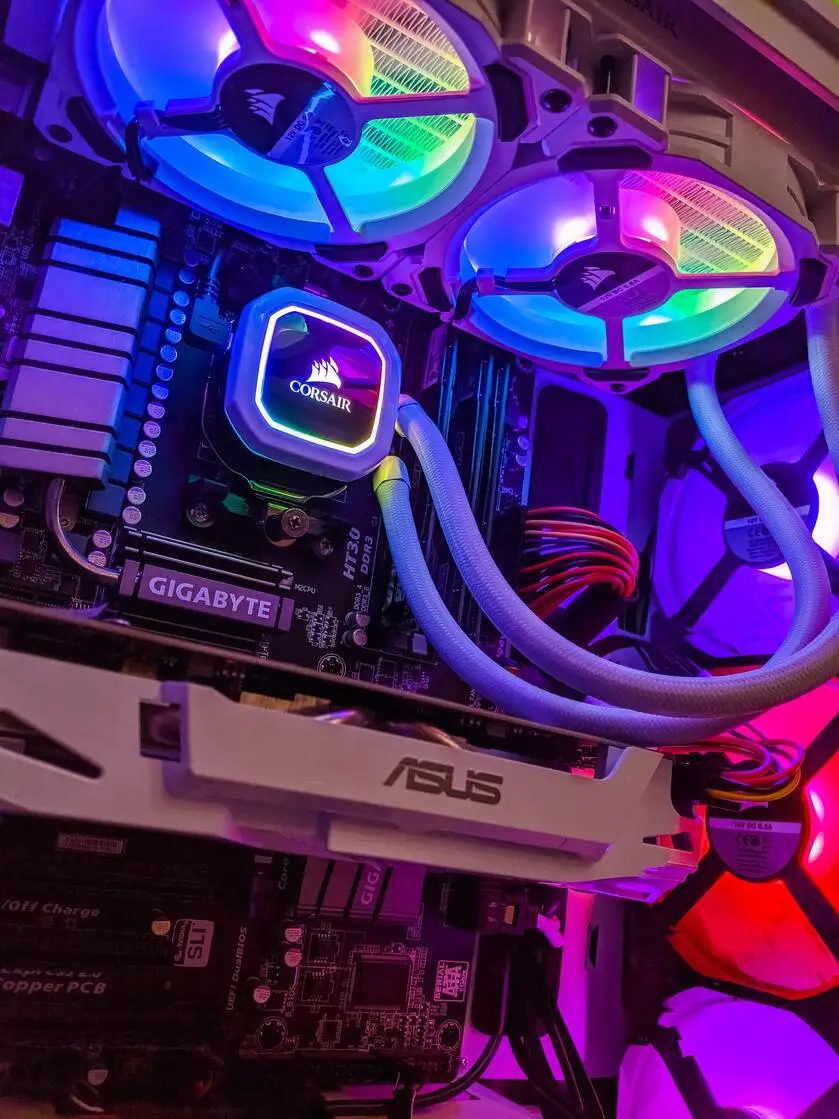
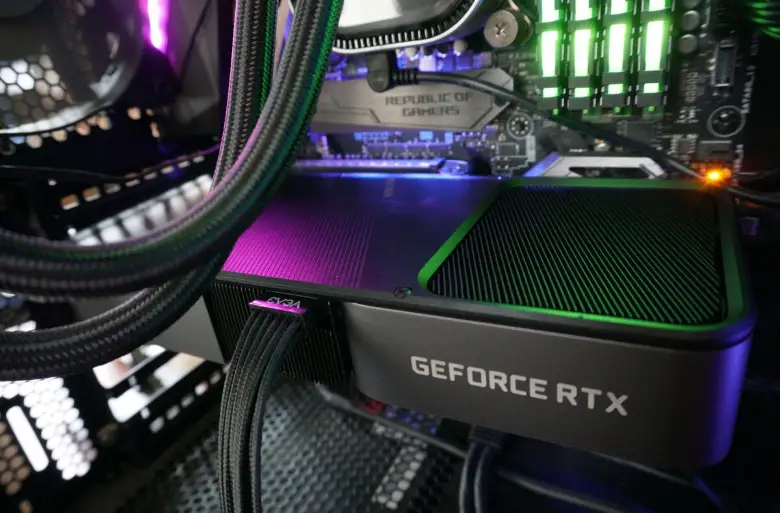
Now, locate the graphic card. It’s easily spottable as it’s one of the large cards installed in the PCI slot near the bottom of your unit.
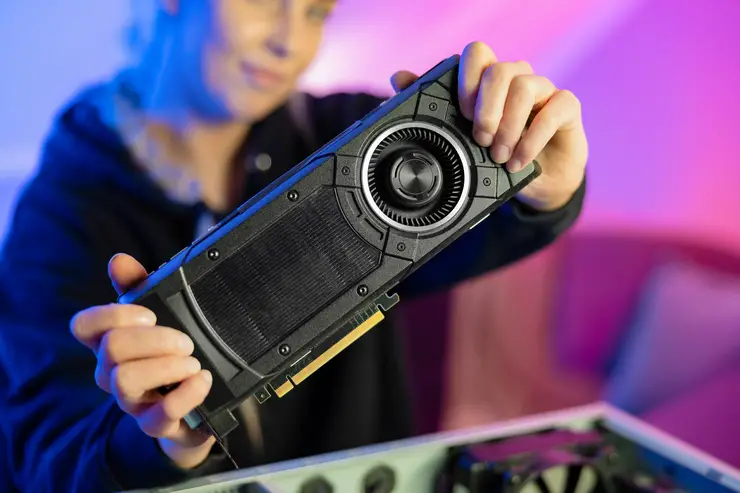
Step # 5: Remove the Old Graphic Card from PC
Graphic cards are normally installed in a PCI slot on the motherboard within your CPU. However, based on the sheer size of your graphic card unit, it is more likely that your GPU must be held in place using a screw installed at the back panel of your CPU case. To remove the GPU from the motherboard, you may first need to unscrew the graphic card from the back panel. Since you’ve already disconnected the HDMI cable from the back panel, you can skip the step of removing the wires.
Next up, check the power cables inside the CPU that connects the card with the system. Most GPUs nowadays require a lot more power and are connected through a number of different power cables. Just unplug all the power connectors connecting the GPU with the CPU. Finally, make sure to push the release tab button, which is normally located near the PCI slot. The plastic tab is a form of a trigger which when released pops the GPU out of the PCI slot. Normally, this plastic trigger is positioned deep underneath the motherboard and is not easily reachable. Just in case, if you can’t reach it directly, you can always use a stick or a pen to press it down. The moment you press it down, you will hear a pop and your GPU will come out of its PCI slot. Now, you can easily remove the GPU unit from the PC case.
In a Nutshell
Hope you now have a clear idea of how to remove a GPU from your system.
Here’s what you need to do step by step.
- Remove the old graphic drivers from your system.
- Discharge static electricity from your system.
- Wear an anti-static wrist wrap
- Remove the side panel of your CPU case
- Remove the old graphic card
If you have any questions related to graphic card installation, please check out our other articles on:
How to Tell If GPU is Working or Not?
What to Do Before Installing a New GPU?
For more details & insights on the latest tech news and tech stuff, subscribe to our weekly newsletter.
Got comments? We would love to hear back from you.
Frequently Asked Questions on How to Remove Graphics Card from Your PC
Got questions? Here we answer the commonest queries regarding how to remove graphics card from your PC:
How do I unplug my GPU from my motherboard?
Follow these steps to unplug the GPU from your computer:
- Power down your computer and open the case
- Unscrew the rear bracket and unplug the power cables from GPU
- Find the lock on the slot of the GPU and hold it on the right
- Pull out the graphics card carefully and it might come out
How do I swap graphics cards?
In order to replace your current graphics card with a new one, follow these steps:
- Uninstall the GPU drivers and plug out the old card
- Place the new GPU into PCLe slot
- Connect the power cables (if the GPU requires)
- Lock the rear brackets back up
- Close the PC case and install the new GPU drivers
How do I identify my graphics card?
Follow these steps to determine the model of your graphics card and get the necessary info:
- Go to the start menu of the computer and type device manager
- Now, you might see an option for display adapters near the left top corner of your screen, click on the drop-down arrow near it.
- That’s it, it’ll show you the GPU your PC is currently using. You can also update the graphics drivers or remove your GPU from here.
Where is the graphics card in a PC?
The graphics card in a computer is located in the expansion slot. Know that the expansion slot is located closest to the processor to form a blazing-fast connection between the CPU and the GPU for ultra-fast data transfer and performance.
Do all computers have a graphics card?
Yes, all computers do have a graphics card as it is essential for the display and graphics. The standard computers, however, come with built-in graphics while dedicated GPUs are installed for higher performance.
